If you’ve ever dreamed of carrying a piece of nature with you everywhere you go, this DIY pressed flower phone case is exactly what you need! Not only is it super easy to make, but it also gives your phone a one-of-a-kind, nature-inspired look that’s both delicate and stylish. Plus, it’s a fun way to preserve your favorite flowers in a functional and beautiful way!
What You’ll Need 🌼🛠️
- Clear phone case (hard or flexible, your choice!)
- Pressed flowers (store-bought or DIY!)
- Mod Podge or clear-drying craft glue
- Small paintbrush
- Tweezers (for precise placement!)
- UV resin or clear epoxy resin (optional for a glossy finish)
- UV lamp or direct sunlight (if using resin)
- Toothpick (to remove air bubbles)
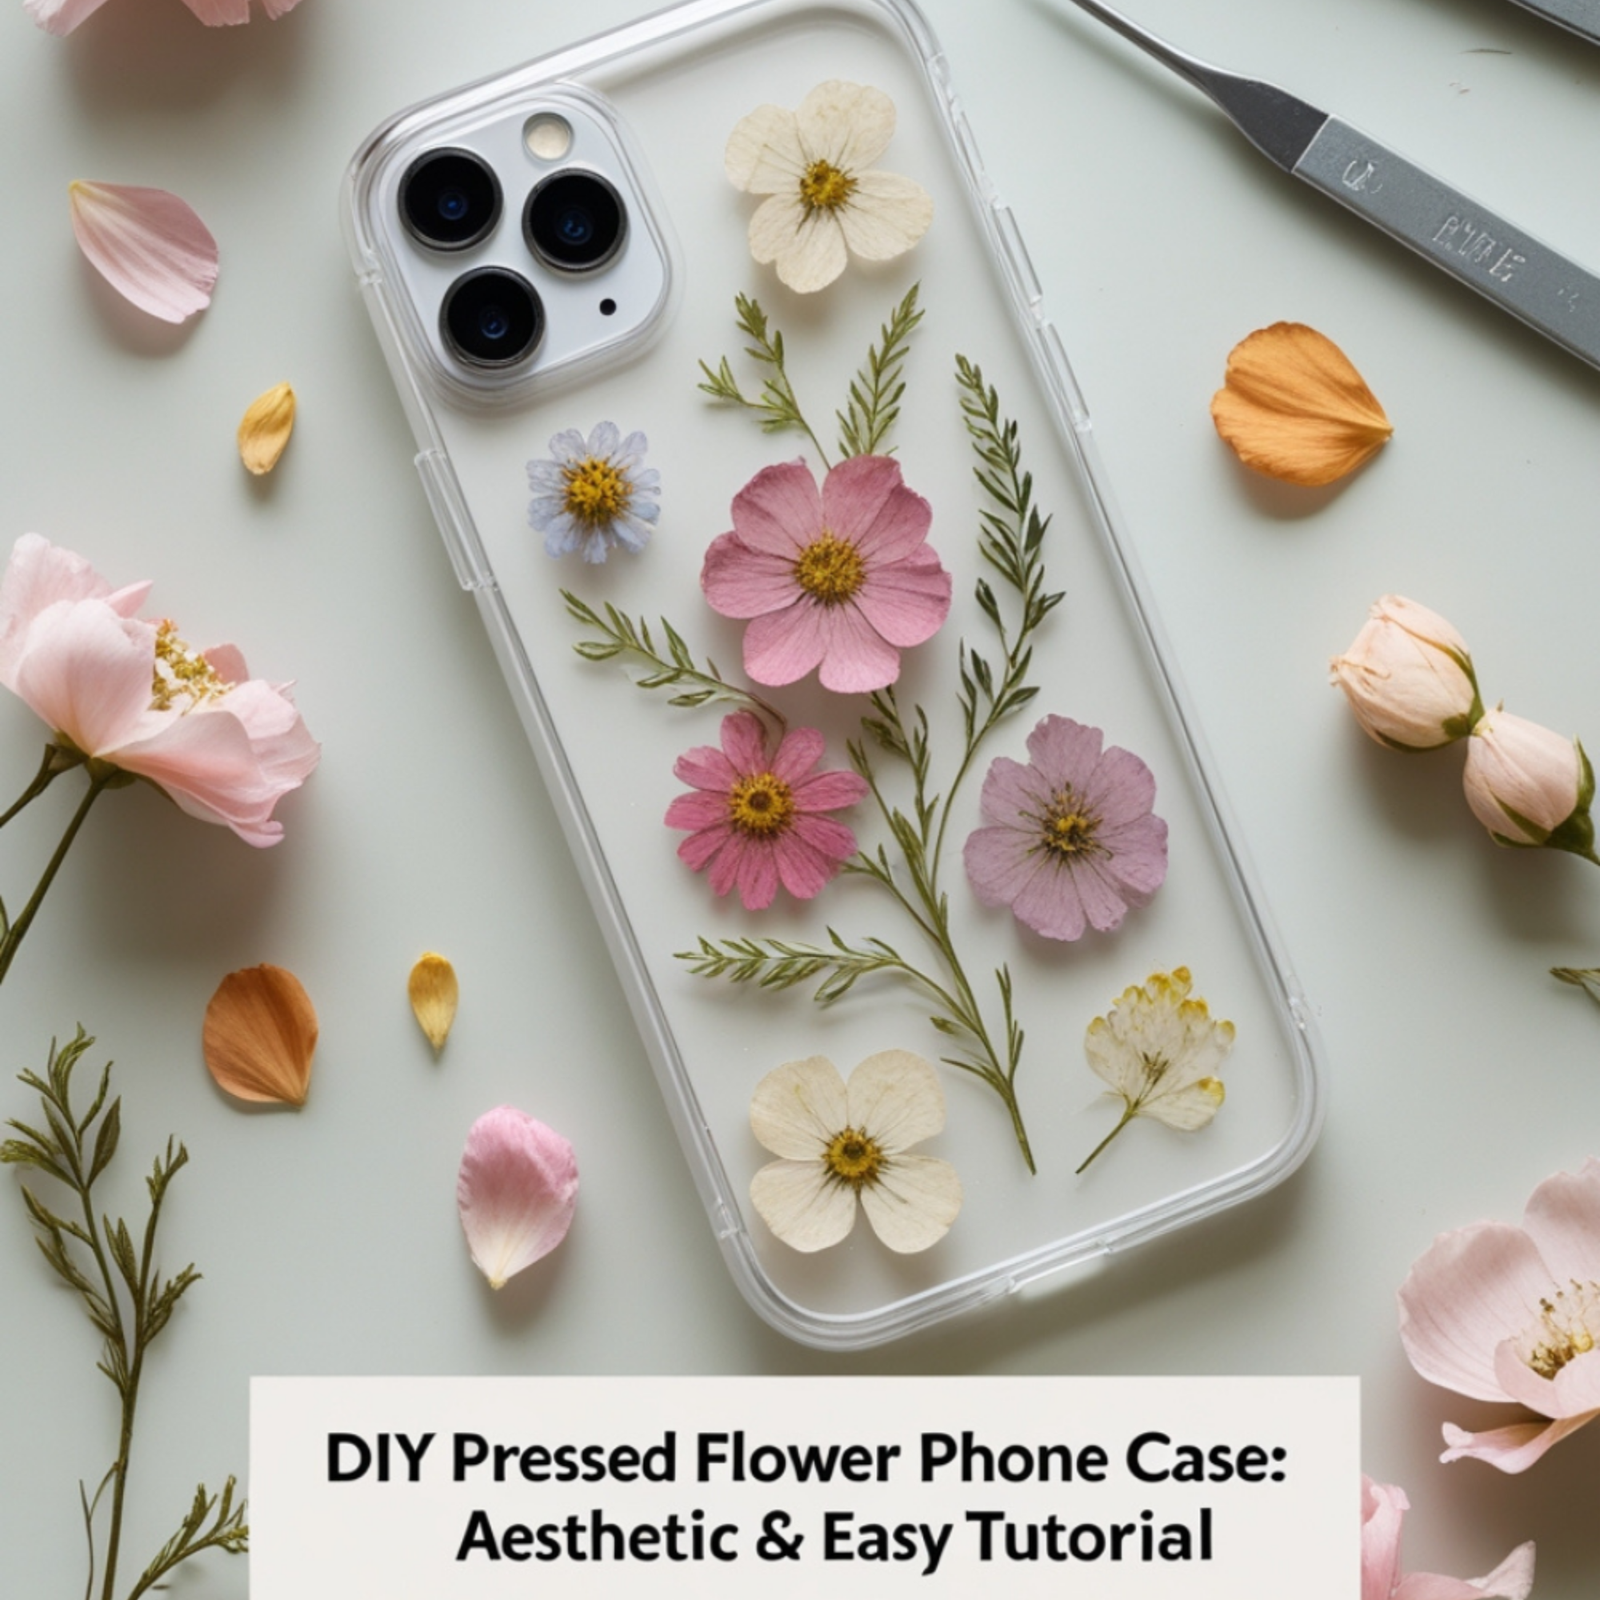
How to Make a Pressed Flower Phone Case
Step 1: Choose & Arrange Your Flowers
Carefully sort through your pressed flowers, pick out the prettiest blooms and arrange them in a delicate, artistic pattern on your phone case. Soft pastels, tiny wildflowers, and bursts of color create a floral masterpiece that looks straight out of a fairytale.
How to Do It:
- Lay out your clear phone case on a flat surface.
- Arrange your pressed flowers on the outside of the case before gluing anything down.
- Experiment with different patterns and placements—go for a minimalist single flower look or a full-on floral explosion!
- Use tweezers for precise placement, making sure the flowers fit the case properly.

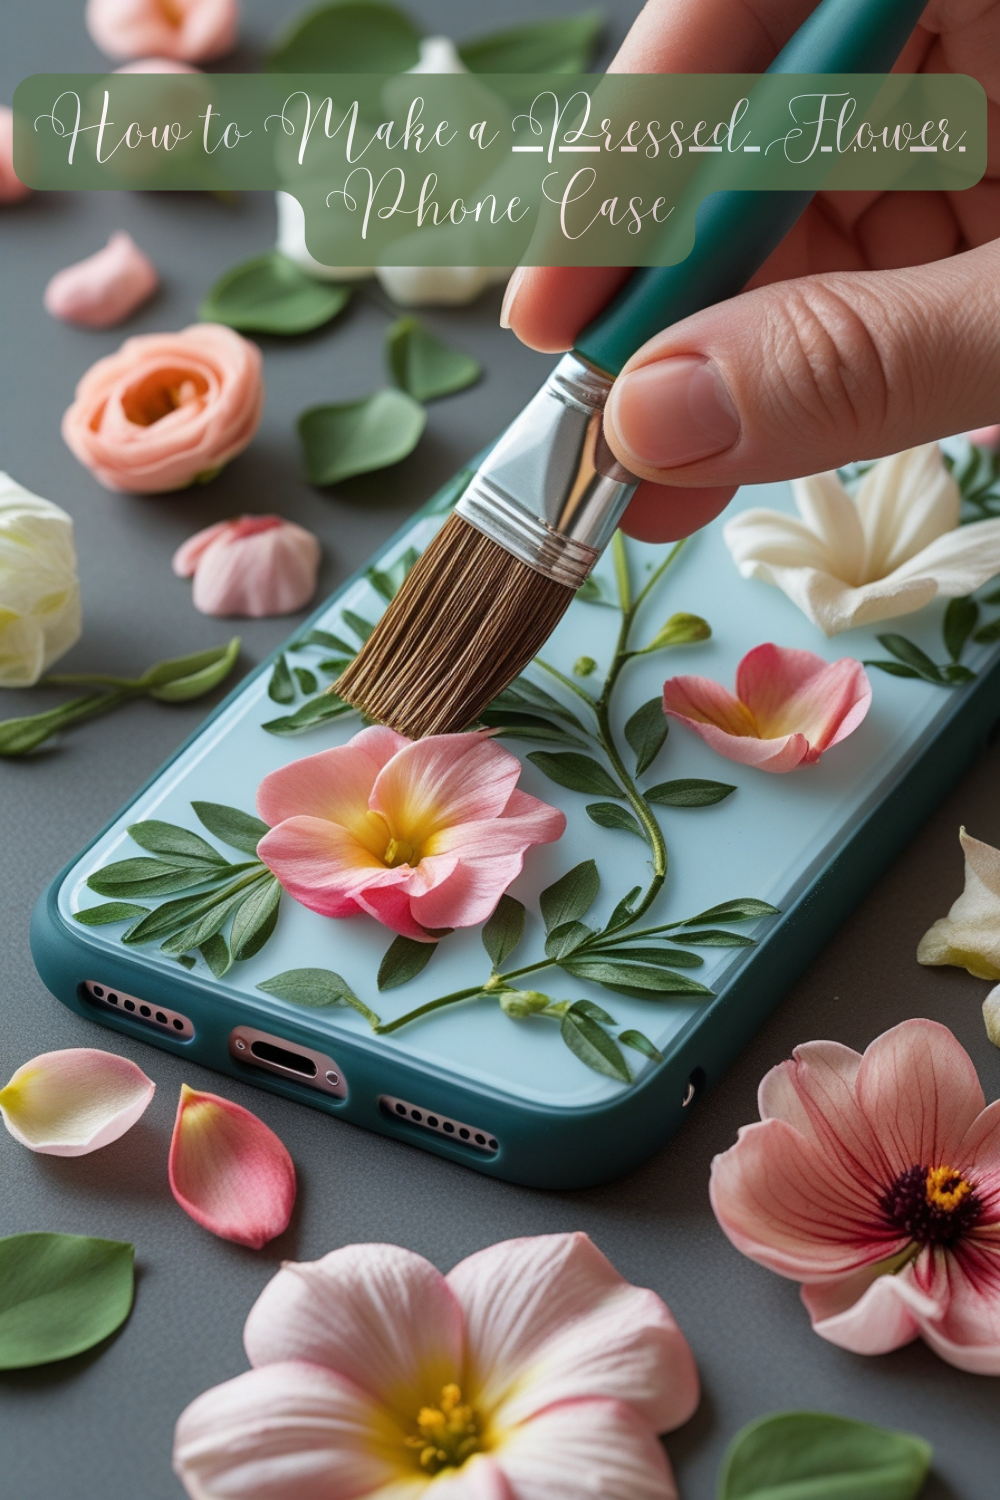
Step 2: Secure the Flowers with Glue
With a gentle hand, you carefully brush on a thin layer of glue, securing each flower in place like a botanical artist at work. The petals blend seamlessly into the case, creating a stunning, nature-infused aesthetic.
How to Do It:
- Once happy with your design, use a small paintbrush to apply a thin layer of Mod Podge or craft glue onto the case where the flowers will go.
- Gently press each flower into place using tweezers.
- Brush another thin layer of glue on top of the flowers to seal them in.
- Let it dry for at least an hour before moving to the next step.
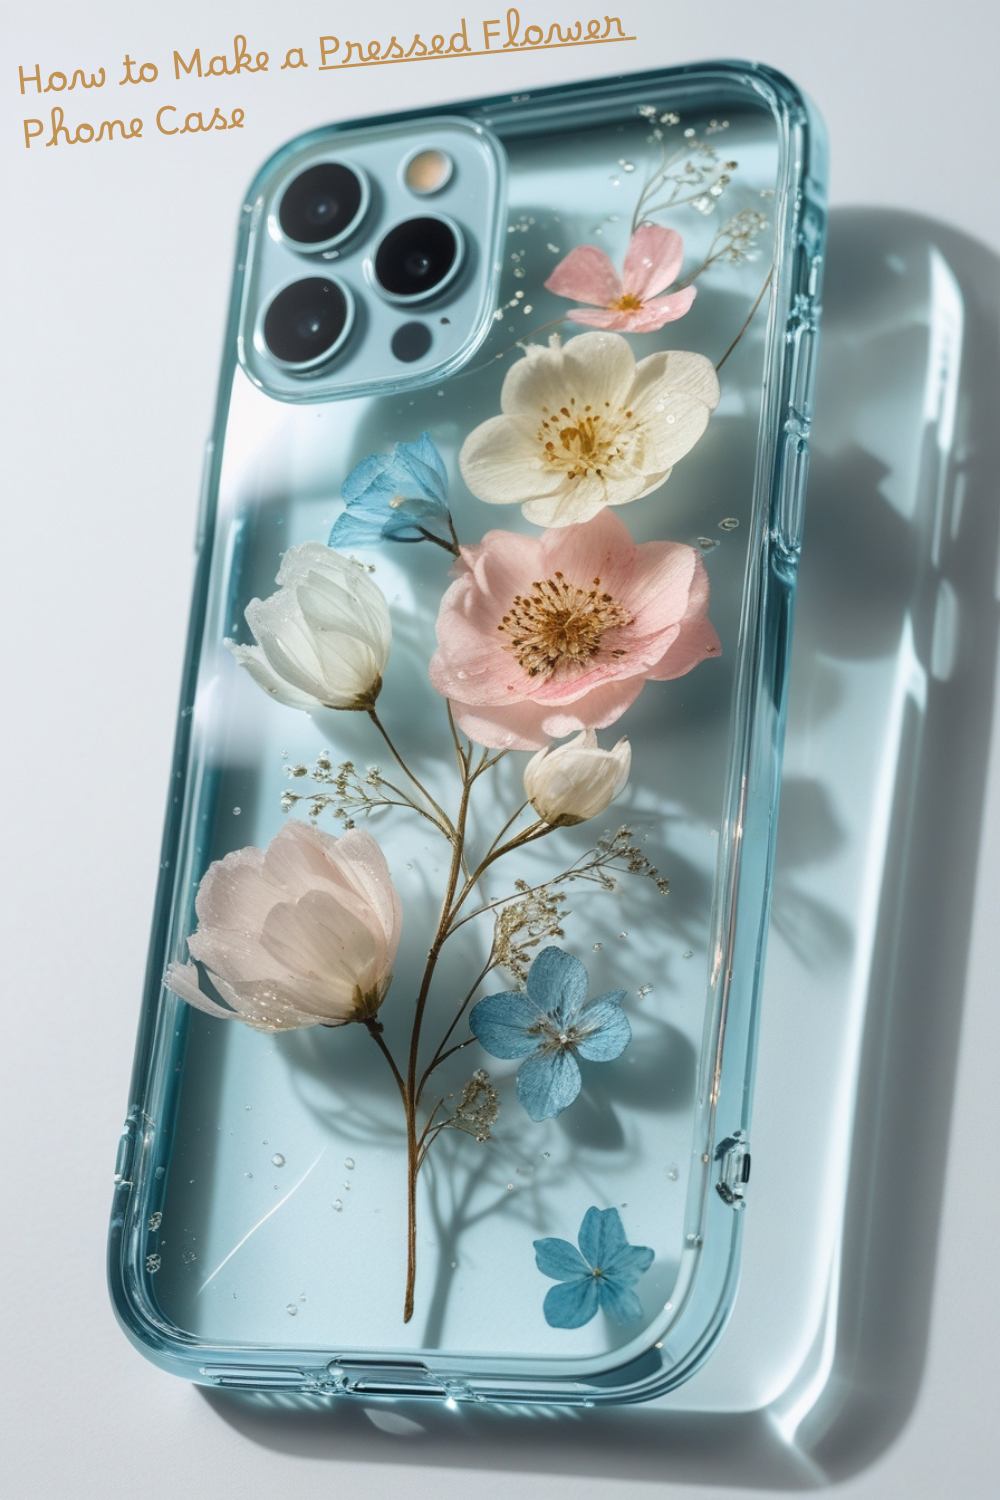
Step 3: Add a Glossy Resin Coat (Optional but Stunning!)
Your phone case will shine with a glossy, glass-like finish that enhances the vibrant colors of the pressed flowers, making them look as if they’re encased in crystal-clear water.
How to Do It:
- If you want a professional-looking finish, mix and pour a thin layer of UV resin or clear epoxy over your design.
- Use a toothpick to pop any air bubbles and spread the resin evenly.
- Place your phone case under a UV lamp or in direct sunlight to cure the resin completely.
- Once hardened, the case will be smooth, glossy, and ultra-durable!
Step 4: Enjoy Your Stunning Floral Phone Case!
You will hold your phone, admiring the way the flowers glow under the sunlight, making your case look like a dreamy garden frozen in time. Every time you take a call, send a text, or snap a selfie, you get a little reminder of nature’s beauty.
How to Do It:
- Once fully dried, carefully snap your phone into the case.
- Enjoy the aesthetic, cottagecore vibes every time you use your phone!
- Show off your handmade creation and maybe even make extras as gifts!

This DIY pressed flower phone case is the perfect way to blend technology with nature in a truly beautiful and personal way. Whether you go for soft pink petals, bold red blooms, or dreamy lavender sprigs, your phone case will be a unique piece of floral art that turns heads everywhere you go. Plus, making one is so much fun—why stop at just one?
💖 Save this for later & pin it to your DIY board! 📌🌸