I am new to the coffee-brewing journey. It all started with a pack of free coffee beans.
What else can we do with the pack of beans other than brew it? So we sought out to buy a very affordable coffee drip and filter, and decided on the Timemore C2 grinder to grind the coffee beans.
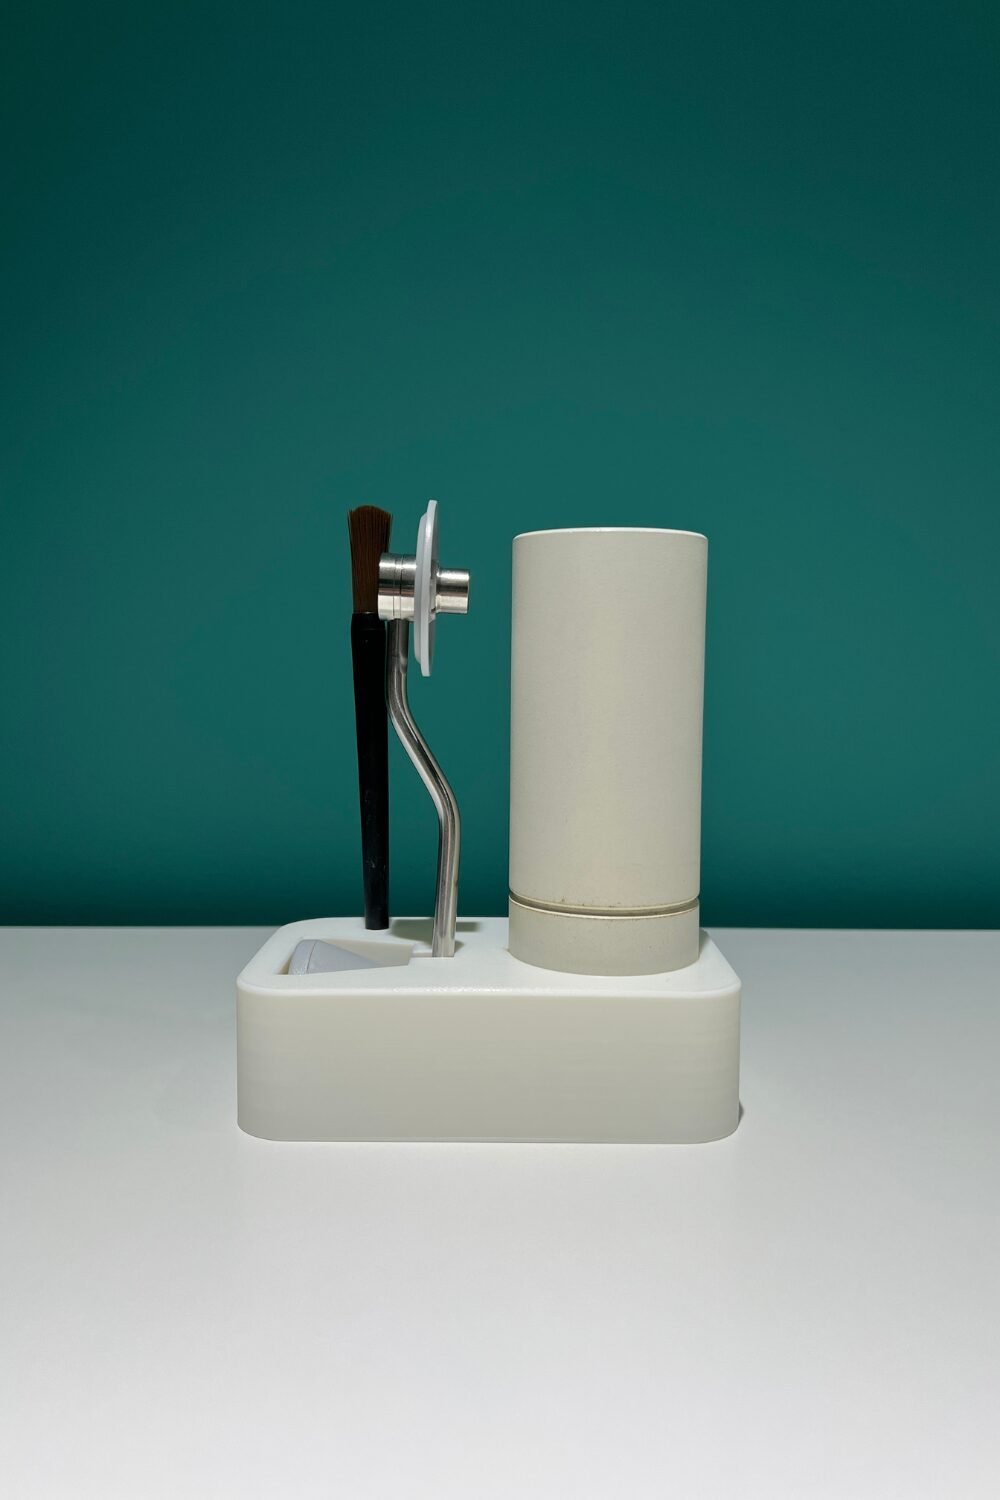
Timemore C2 Grinder
Once we’ve ground the beans and filtered it, our minds were b l o w n! The coffee was significantly different from the typical coffee that we buy. The aroma, the taste… it was so clean (I probably am lacking the words to describe this).
So we kept on using it day by day… and after a while, we got annoyed with how the handle was very clunky when put together with the body of the grinder. On top of that, we have to take extra effort to be sure that the brush remains dry.
This experience birthed the Timemore C2 coffee grinder holder :
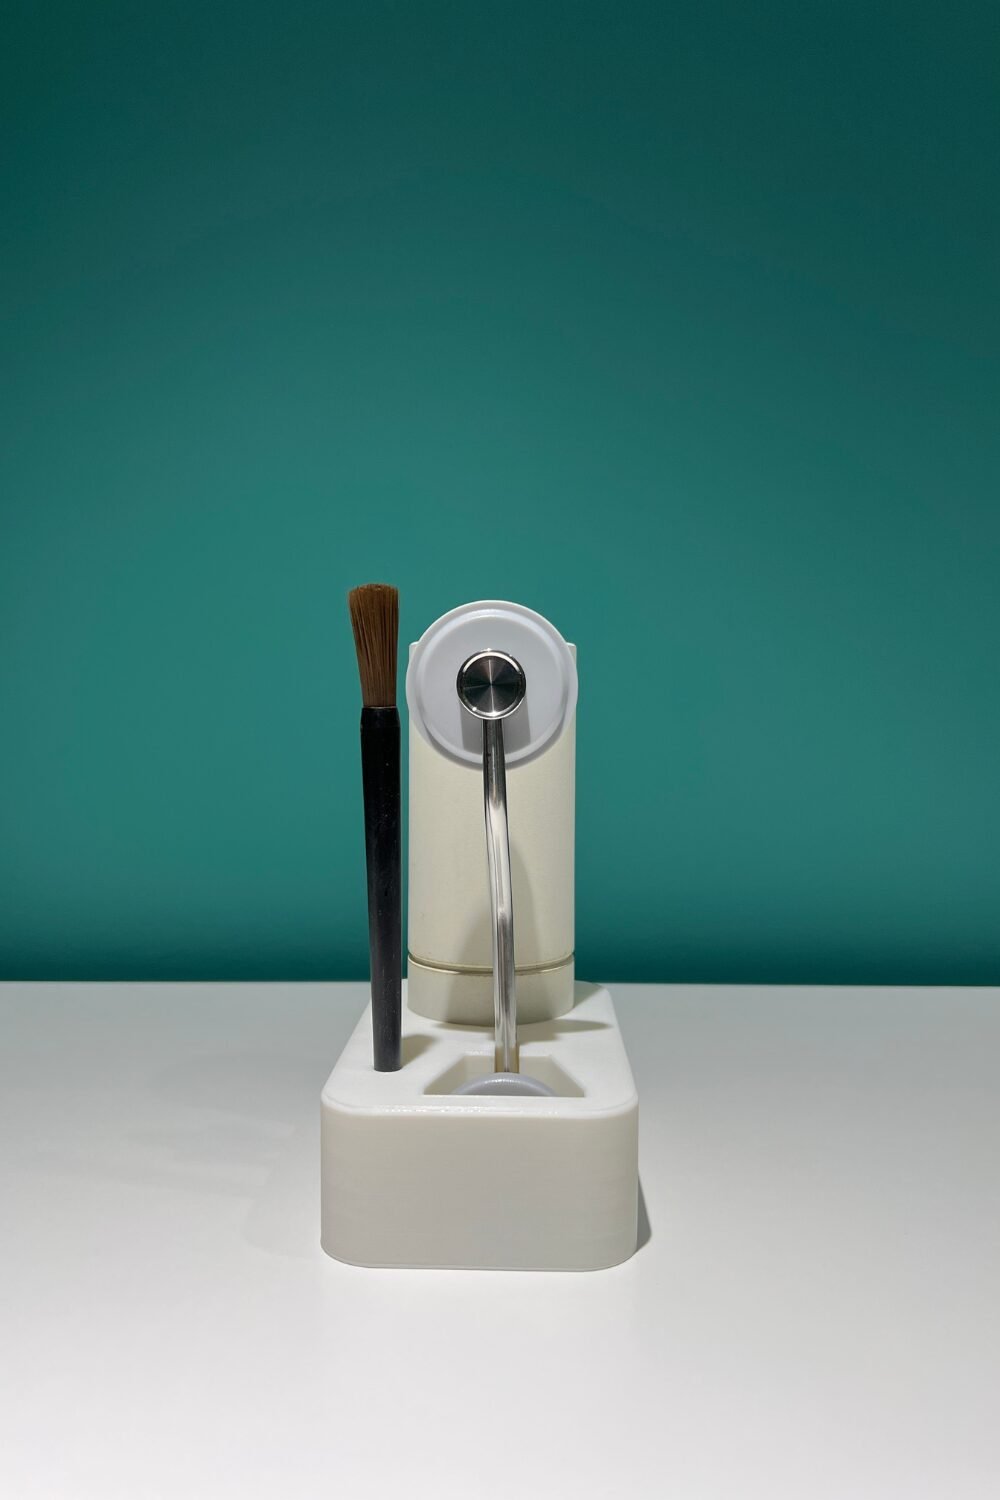
The holder puts the grinder, the handle, and the brush in their respective places so we can easily pick it up when we need it, and this way, the brush is always dry.
Why the Timemore C2 Grinder Holder is a game changer
- All of the accessories that comes with it are at one place
- Each of the accessories have a dedicated place and location so we know exactly where to find it before use or place it after use
- (Optional) You can place a clear cover to protect all of these from dust!
Our coffee-brewing experience has been a lot smoother ever since.
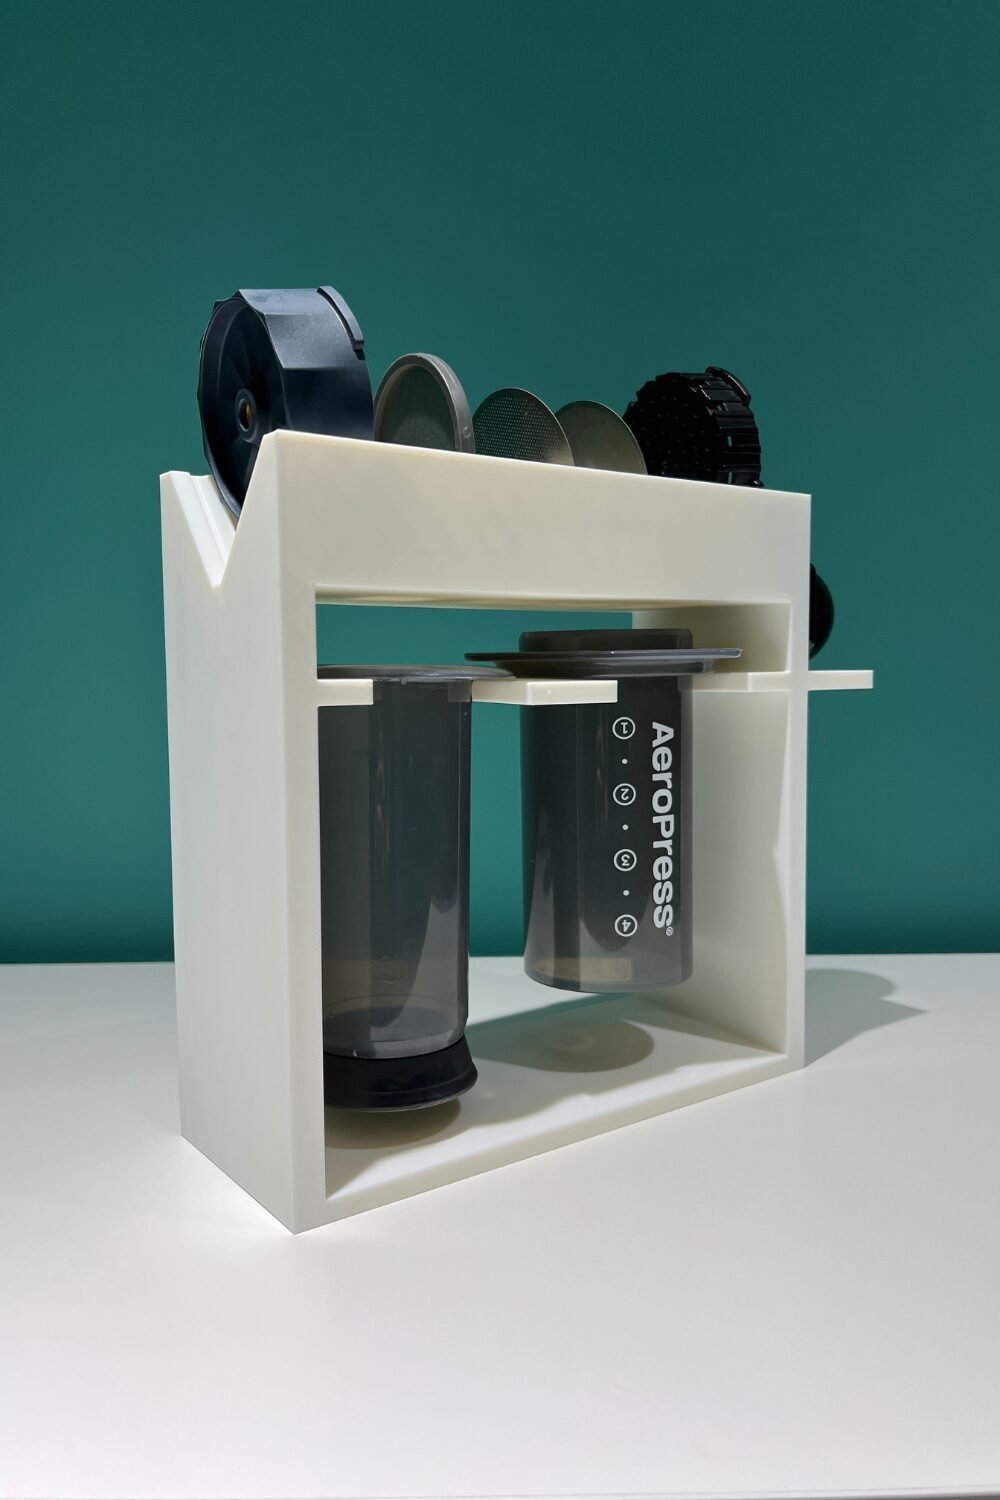
Here’s how it looks from the side profile.
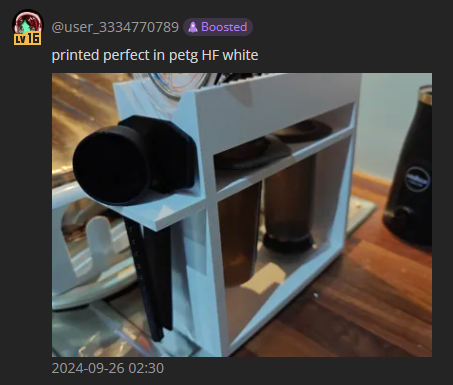
After a while of using the drip filter, we eventually learnt that we may not be getting the maximum extraction of the coffee beans using a drip filter, so my husband invested in… the Aeropress!
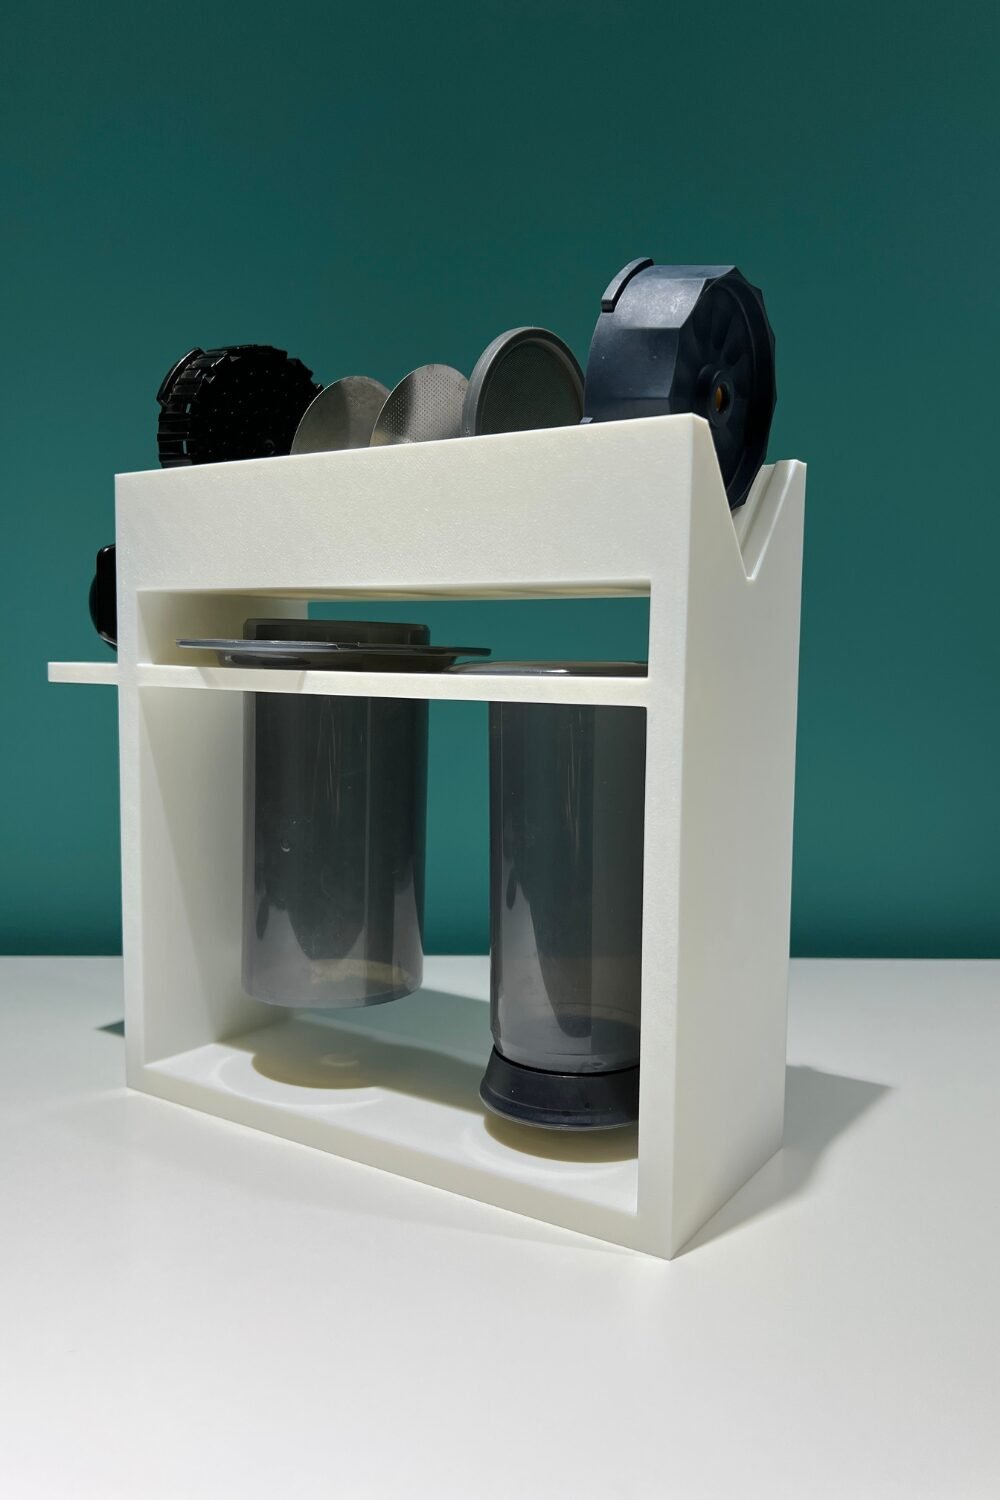
Aeropress
If Timemore C2 grinder’s accessories were annoying for us, Aeropress’ accessories were even more so! It had the plunge, the body, the metal filter, the cover…… etc.
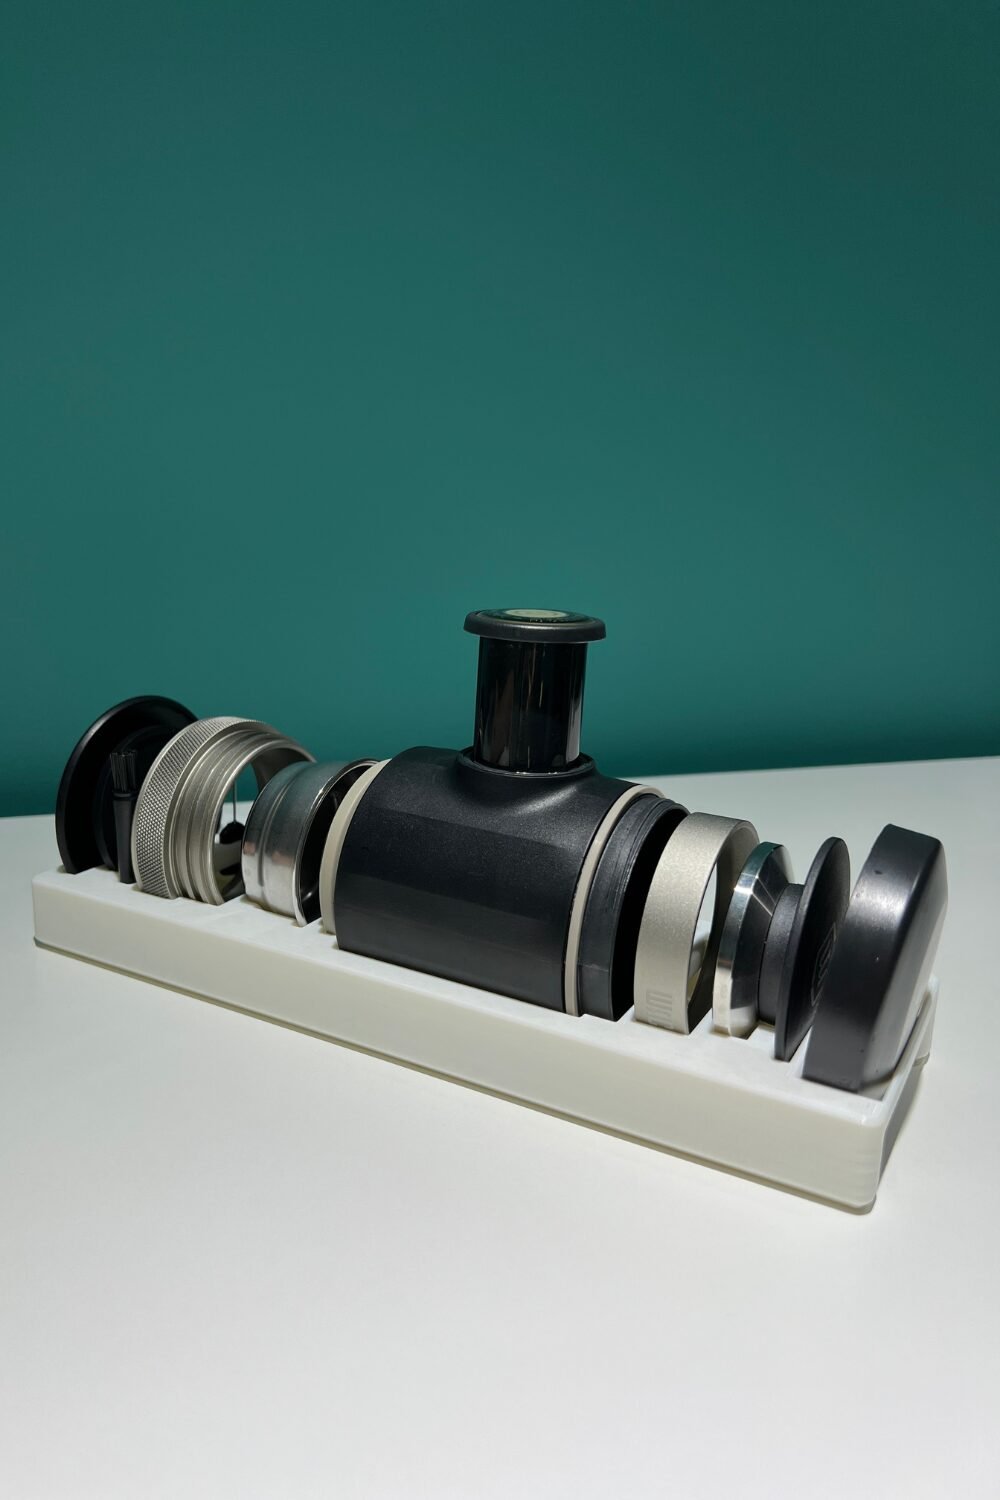
So of course my husband designed a rack to hold all of these accessories. Here’s how it looks now :
What a beauty!
You can imagine the mental load off our minds having all the accessories organised in one place.
Why Aeropress Accessories Holder is life changing
1. All the necessary attachments at one place
As the Aeropress had a lot more accessories, the rack was even more necessary for us, and improved our coffee brewing experience significantly.
2. Additional space on the rack for more filter variations
We invested in a few metal filters with varying filter hole sizes to test out which one we might prefer more. So the rack was convenient to place all the metal filters we have purchased and tested.
3. Easy way to dry all of the accessories
The slot to place the bodies of the Aeropress was perfectly sized for each of them so you can easily mount it on, without struggling or aim it perfectly.
It is designed to hang on the rack so that water can easily drip off and dry faster. Place it near a kitchen window for a faster drying process!
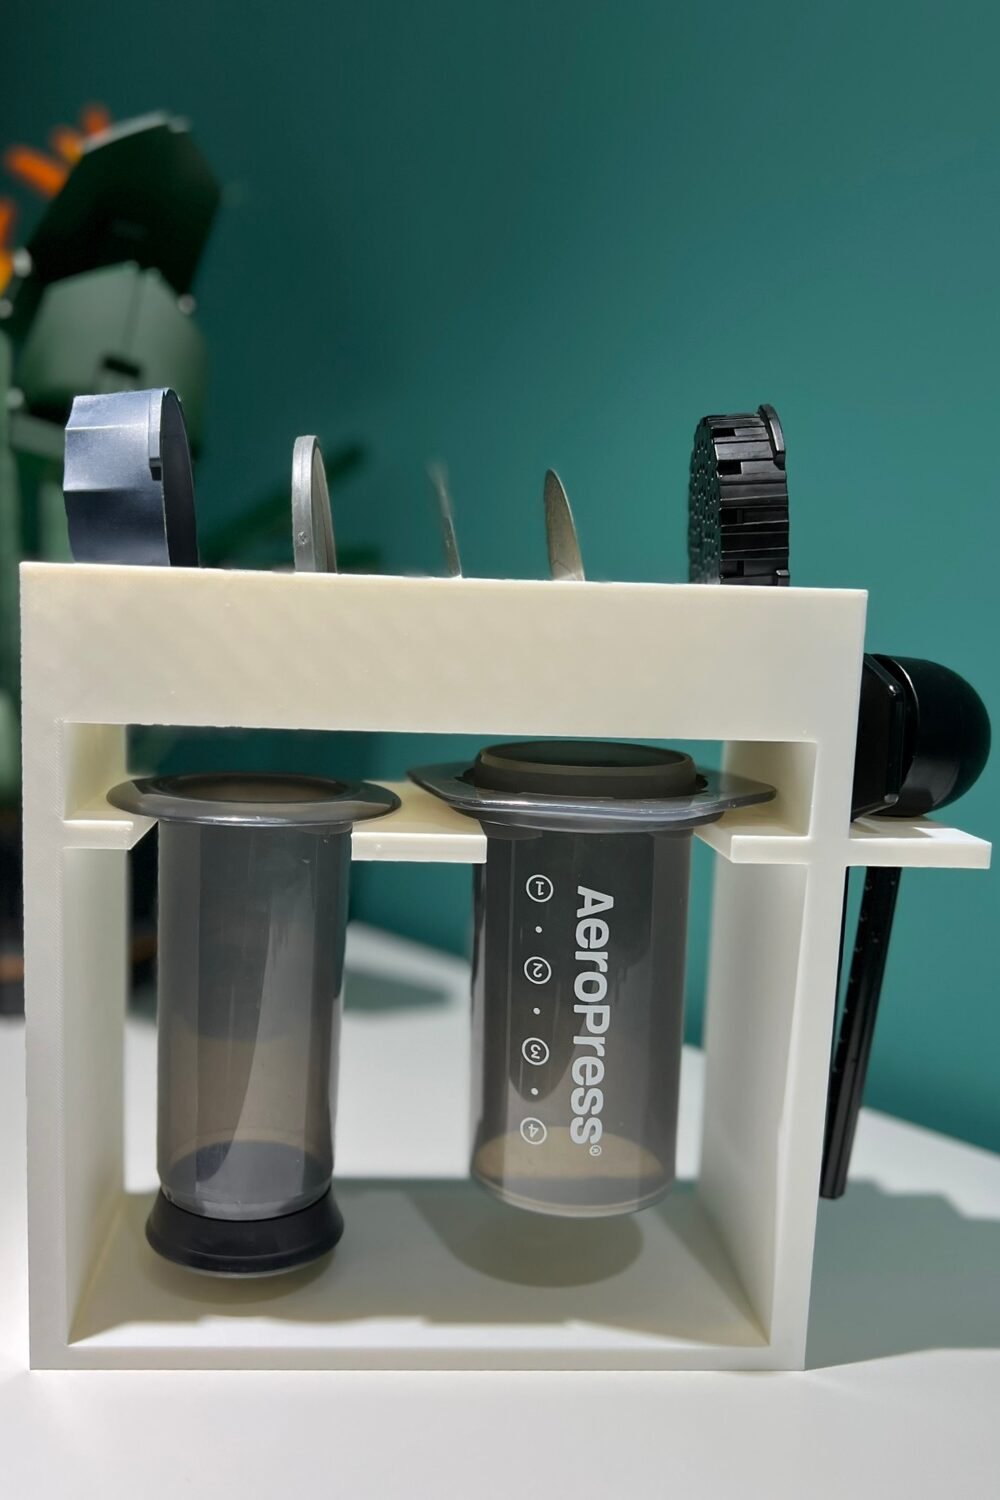
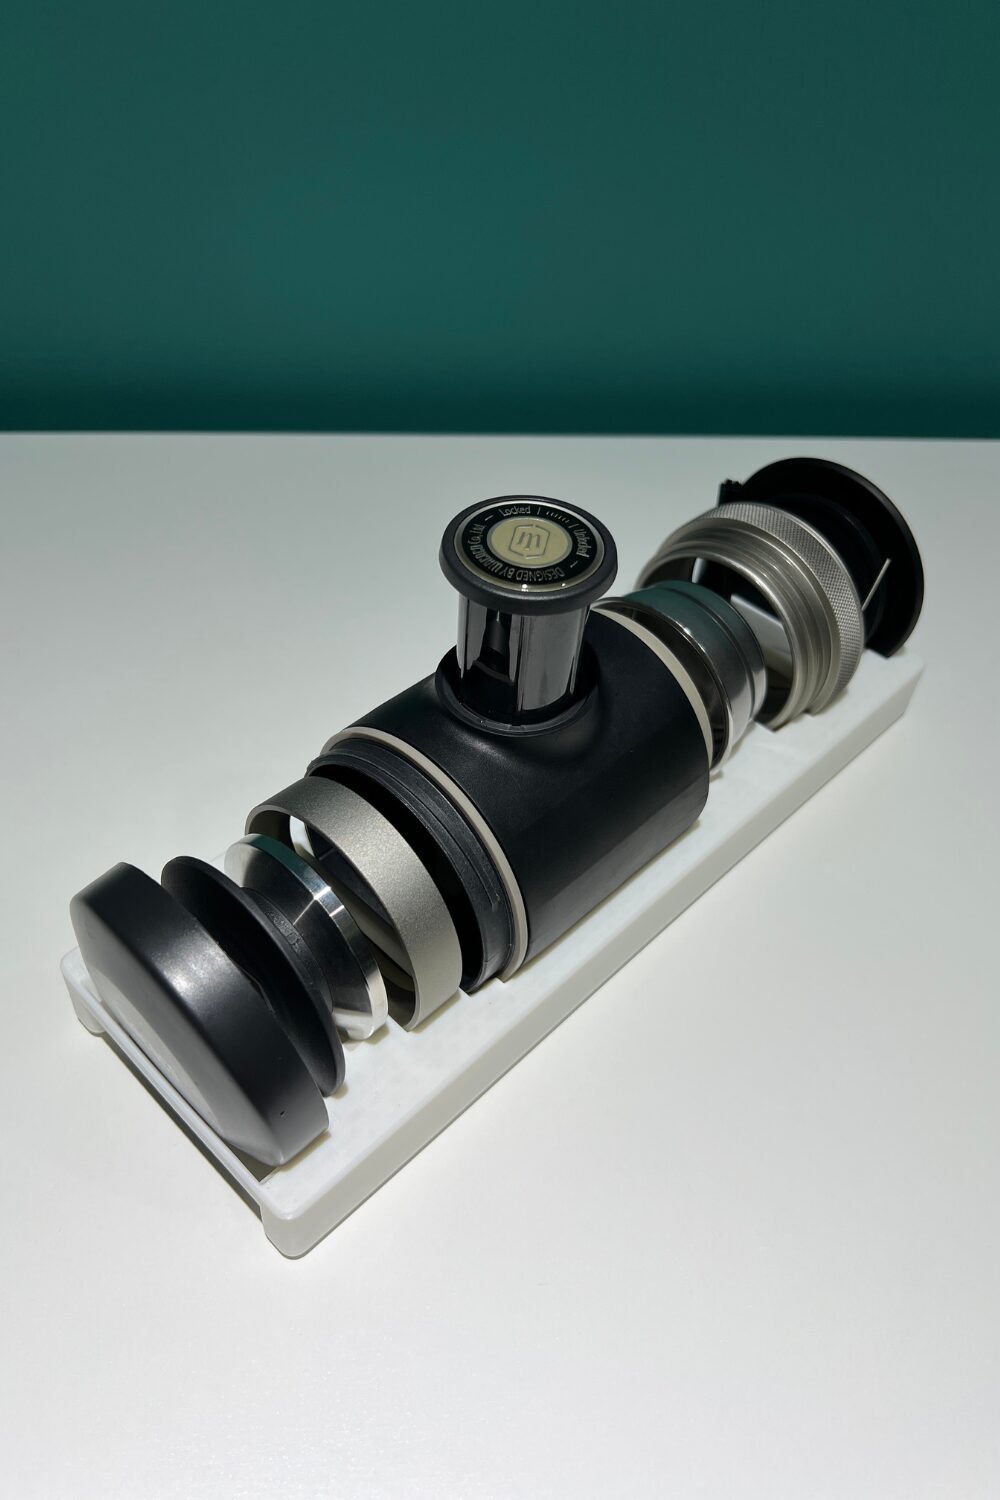
Here’s another angle of the rack.
If you read my previous blog post, I am not the best plant mum… so I “upgraded” to LEGO’s Birds of Paradise (featured at the back of the photo)
If you’re interested in getting this rack, you can get the STL file here!
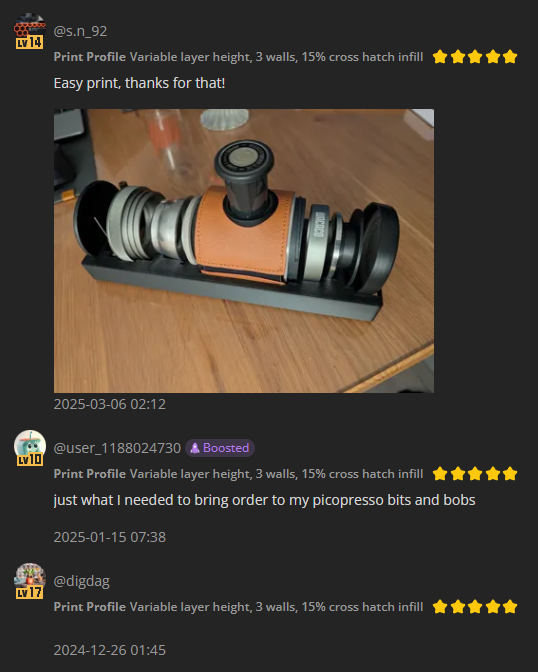
Here are some reviews from users who have printed the file and used them :
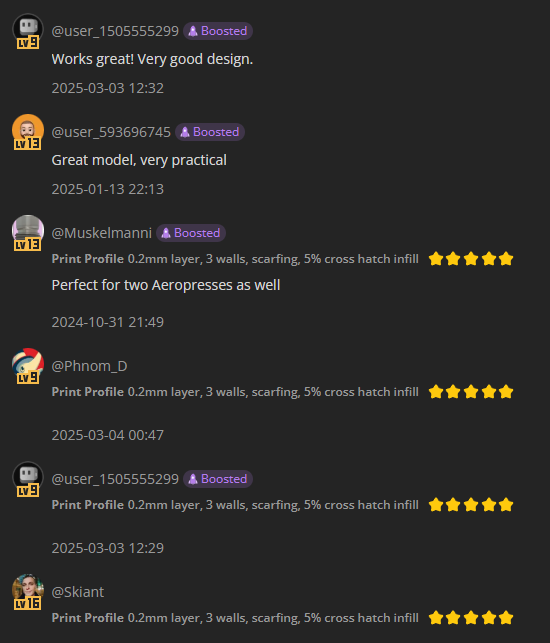
Trust me, you will enjoy brewing coffee even more with this!
Picopresso
We got the Picopresso! This was more exploratory than a real need. We see this as progress in our coffee journey… at least we hope it is.
Turns out, it is! Picopresso is now our go-to for our daily cuppa.
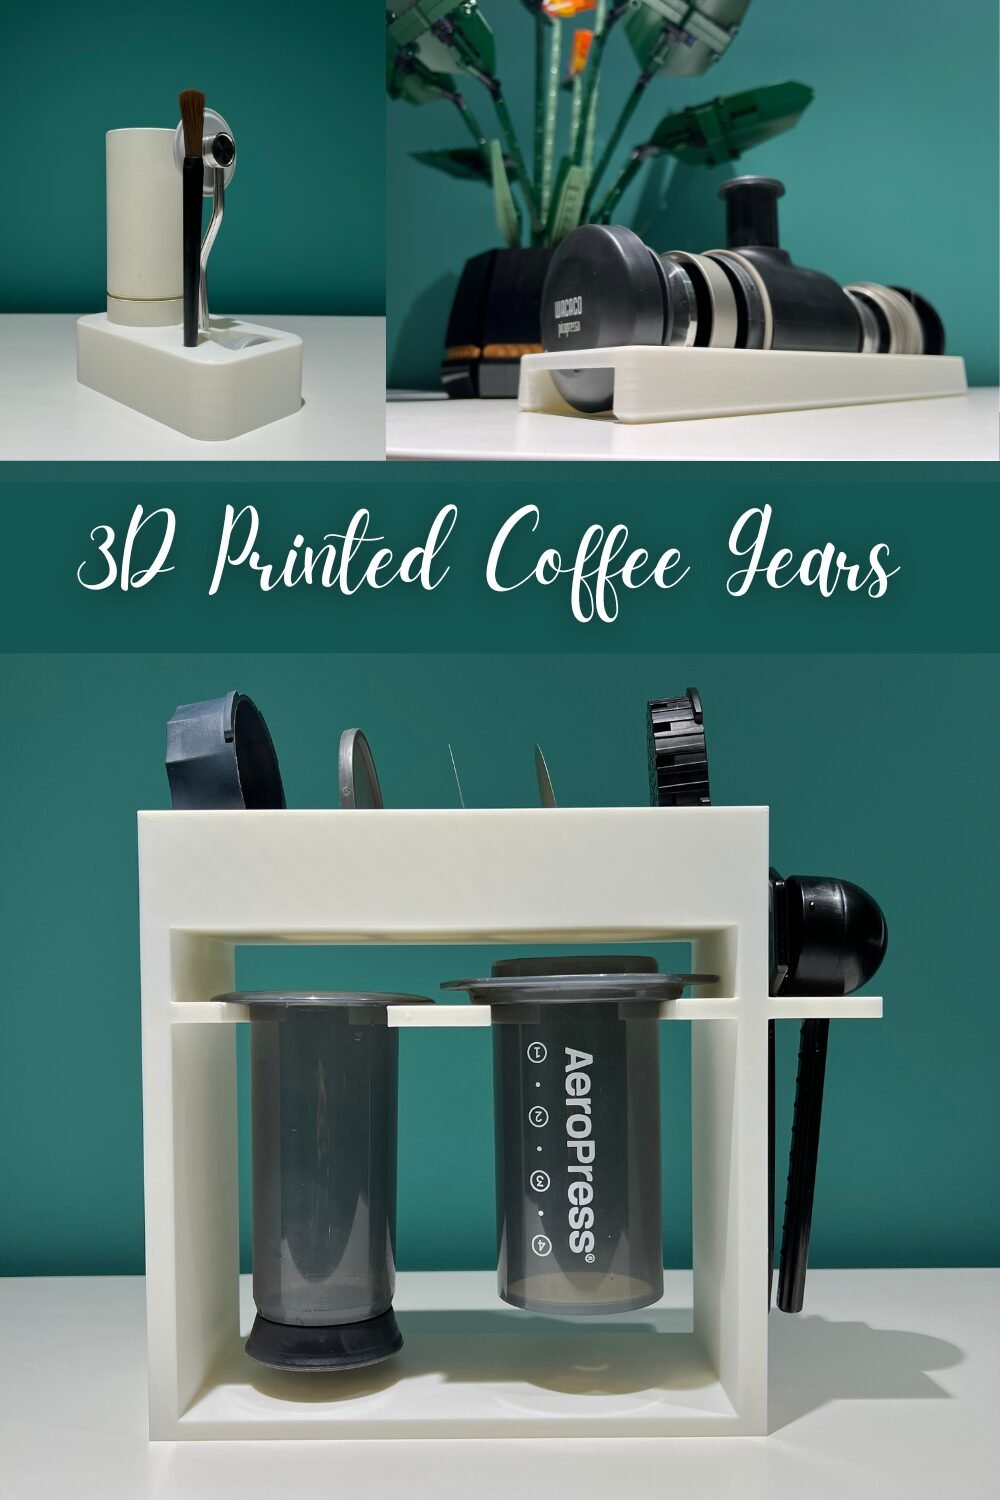
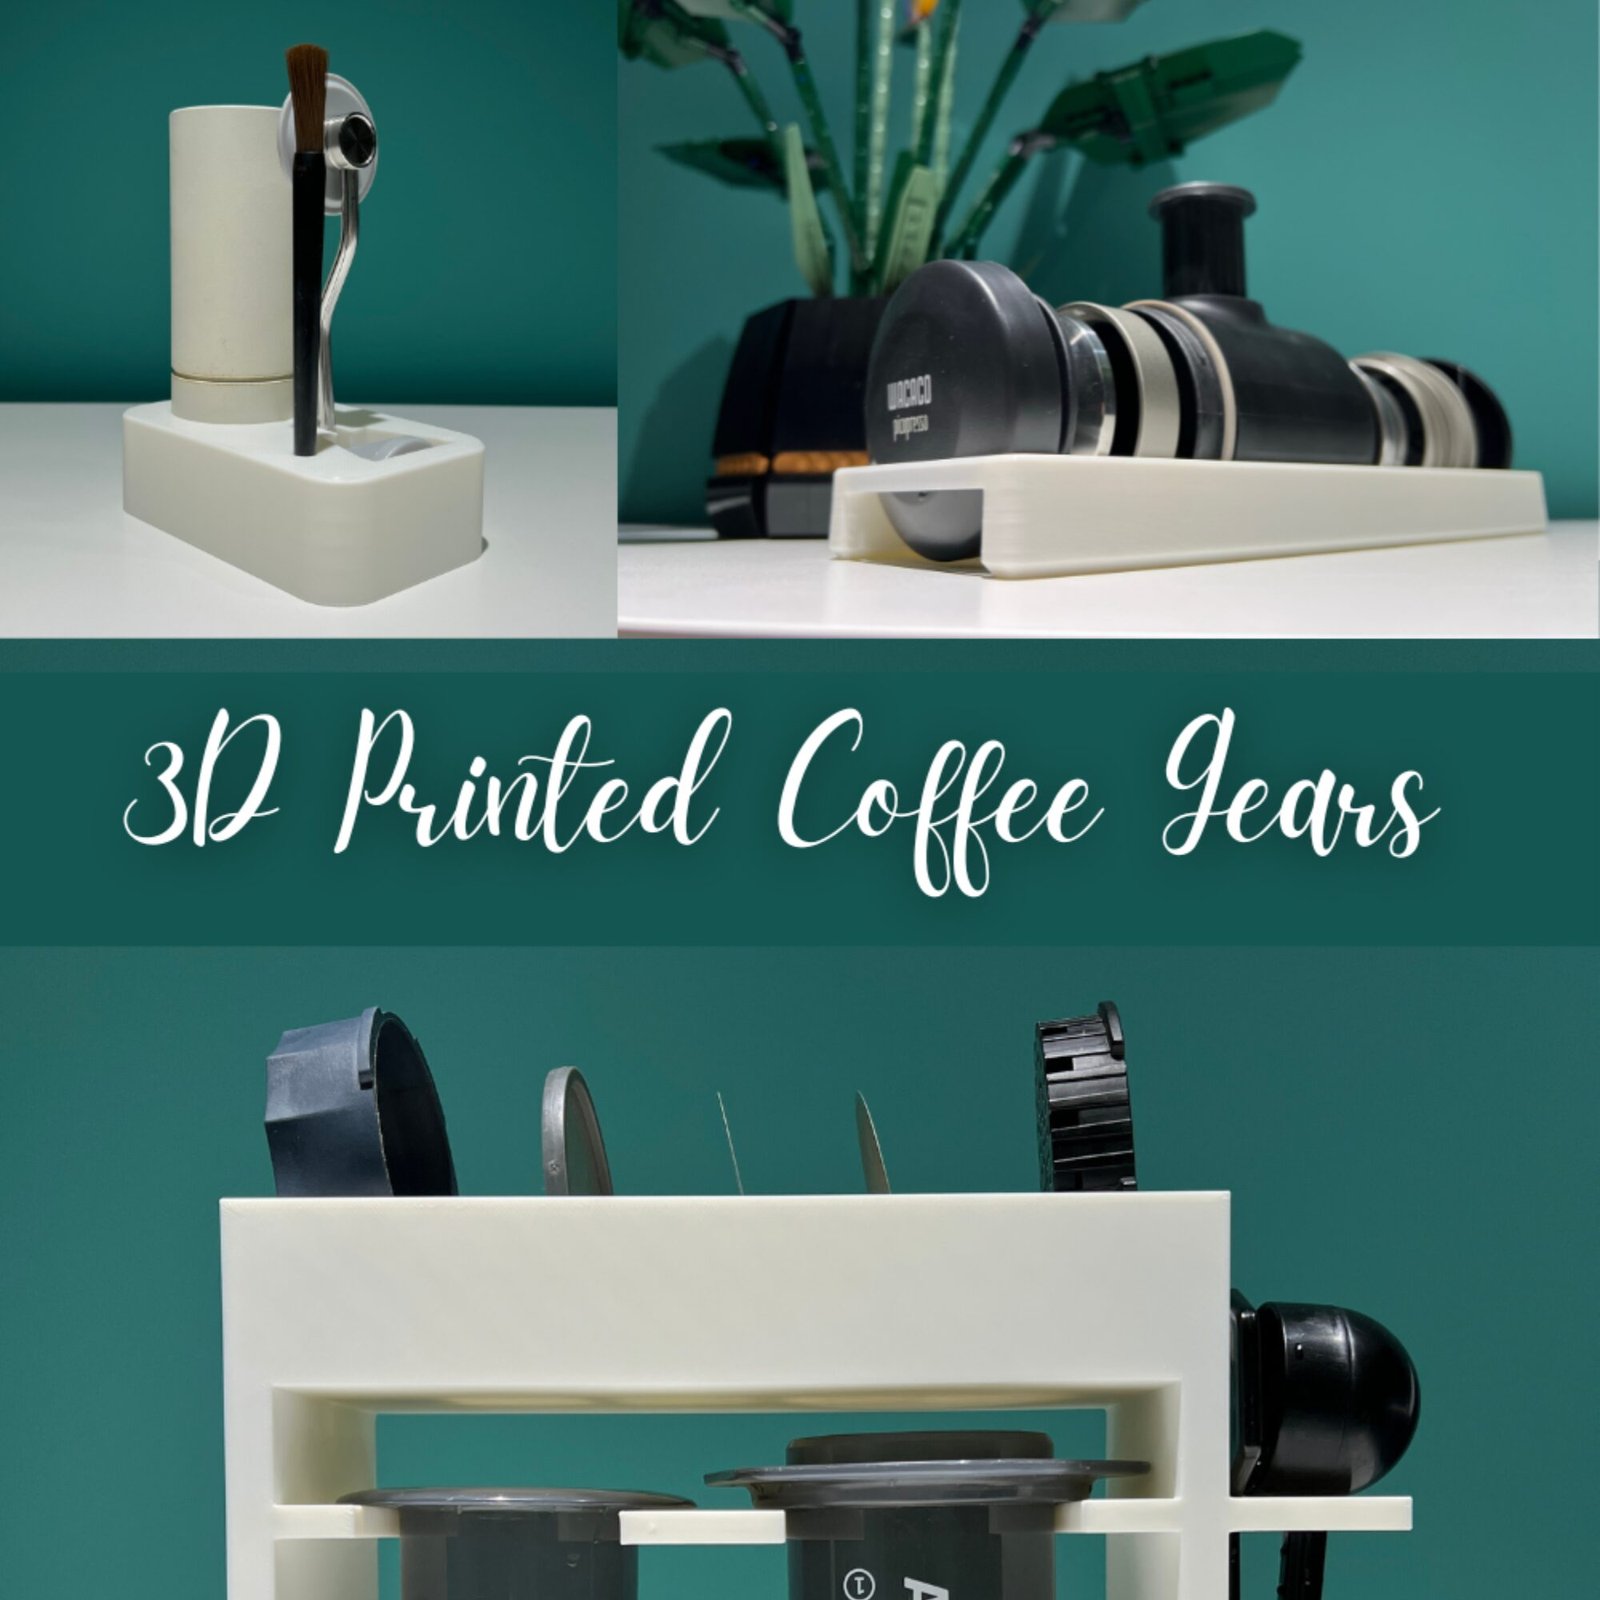
Picopresso has a lot more accessories than Aeropress, so we created a rack for this.
Here’s how it looks like :
As much as possible, we place the accessories that gets used together close to each other so it’s more convenient when used.
At the start, learning to use Picopresso, I took a long while to learn what each accessory was used for, and how to use it. After a while learning the steps and process, on top of using this rack, brewing coffee became easier.
How Picopresso Rack improved our coffee experience
1. All accessories in their designated space
Picopresso has a lot of accessories, and there are specific steps to follow when brewing with it. With the rack, each of these accessories have their specific slot, and accessories used in tandem are placed close together making it easier to pick them up.
2. Ease of drying each accessory on the rack
It’s designed such that the slot is not enclosed so it can dry each of the accessory. Place it near the kitchen window for it to dry faster.
3. Slim and compact
Compared to the Aeropress, this design is more slim and compact, covering just a small space on your kitchen counter.
If you have a Picopresso, you would want this! Get the STL file here.
Here’s review from some users :